
AWS CloudFormation and Terraform offer the approach of Infrastructure as Code (IaC). With IaC, you can provision, manage and maintain different resources and services on the AWS platform. In this article we talk about how these tools are easy to use and walk you through a basic example for each one.
CloudFormation is the service created by Amazon where you can write a template and provision all the infrastructure resources in your cloud environment. This template can either be in JSON or YAML format, so choose the one that fits you better.
The template consists of five sections. Only the Resources one is mandatory. The sections are:
When you deploy a CloudFormation template it creates a stack. A stack is a collection of AWS resources that you can manage as a single unit.
The template needs to be saved in a S3 bucket in order to CloudFormation to launch it.
Simple example.
The following is an easy template that creates a S3 bucket and an EC2 instance with a security group within a subnet that it is within a VPC
{
    "AWSTemplateFormatVersion": "2010-09-09",
    "Resources": {
        "easys3buckettocreate": {
            "Type": "AWS::S3::Bucket",
            "Properties": {
                "AccessControl": "Private",
                "BucketName": "aneasys3bucketcreation",
                "VersioningConfiguration": {
                    "Status": "Suspended"
                }
            }
        },
        "easyVPC": {
            "Type": "AWS::EC2::VPC",
            "Properties": {
                "CidrBlock": "10.0.0.0/16"
            }
        },
        "easysubnet": {
            "Type": "AWS::EC2::Subnet",
            "Properties": {
                "VpcId" : { "Ref" : "easyVPC" },
                "CidrBlock" : "10.0.0.0/24",
                "AvailabilityZone" : "us-east-1a"
            }
        },
        "easyec2instance": {
            "Type": "AWS::EC2::Instance",
            "Properties": {
                "AvailabilityZone": "us-east-1a",
                "ImageId": "ami-0cc96feef8c6bbff3",
                "InstanceType": "t2.micro",
                "KeyName": "MyPrivateKey",
                "SecurityGroupIds": [{ "Ref" : "easyInstanceSecurityGroup" }],
                "SubnetId": {"Ref" : "easysubnet"}
            }
        },
        "easyInstanceSecurityGroup" : {
            "Type" : "AWS::EC2::SecurityGroup",
            "Properties" : {
                "GroupDescription" : "Allow http to client host",
                "VpcId" : {"Ref" : "easyVPC"},
                "SecurityGroupIngress" : [{
                    "IpProtocol" : "tcp",
                    "FromPort" : 80,
                    "ToPort" : 80,
                    "CidrIp" : "0.0.0.0/0"
                },
                {
                    "IpProtocol" : "tcp",
                    "FromPort" : 443,
                    "ToPort" : 443,
                    "CidrIp" : "0.0.0.0/0"
                },
                {
                    "IpProtocol" : "tcp",
                    "FromPort" : 22,
                    "ToPort" : 22,
                    "CidrIp" : "0.0.0.0/0"
                }]
            }
        }
    }
}Open CloudFormation Service from the console and click on “Create Stack” button.
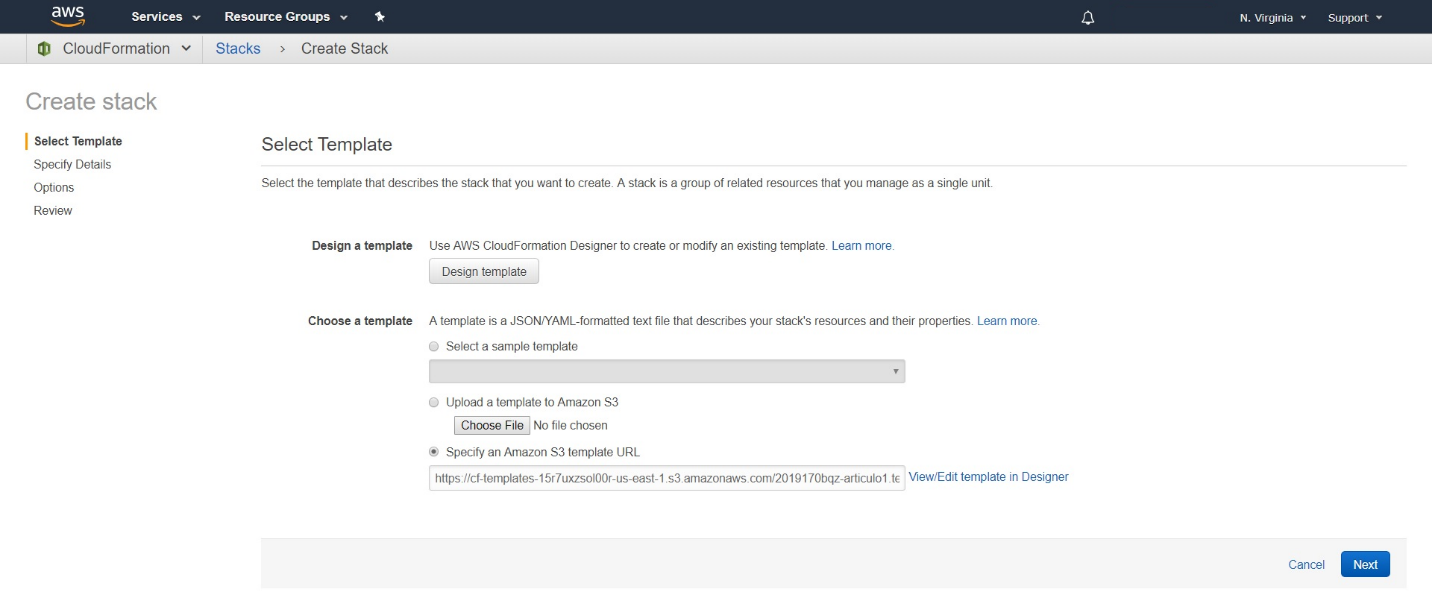
Here you can choose between uploading a template to an Amazon S3 bucket or specify an Amazon S3 template URL. After you selected the template you want to launch, click on “next” button.
On the next screen you need to give a name to your stack.

Click on “next”.
In the following screen, you can change some options if you want, for example tagging the resources in your stack, add an IAM role, among other different options.
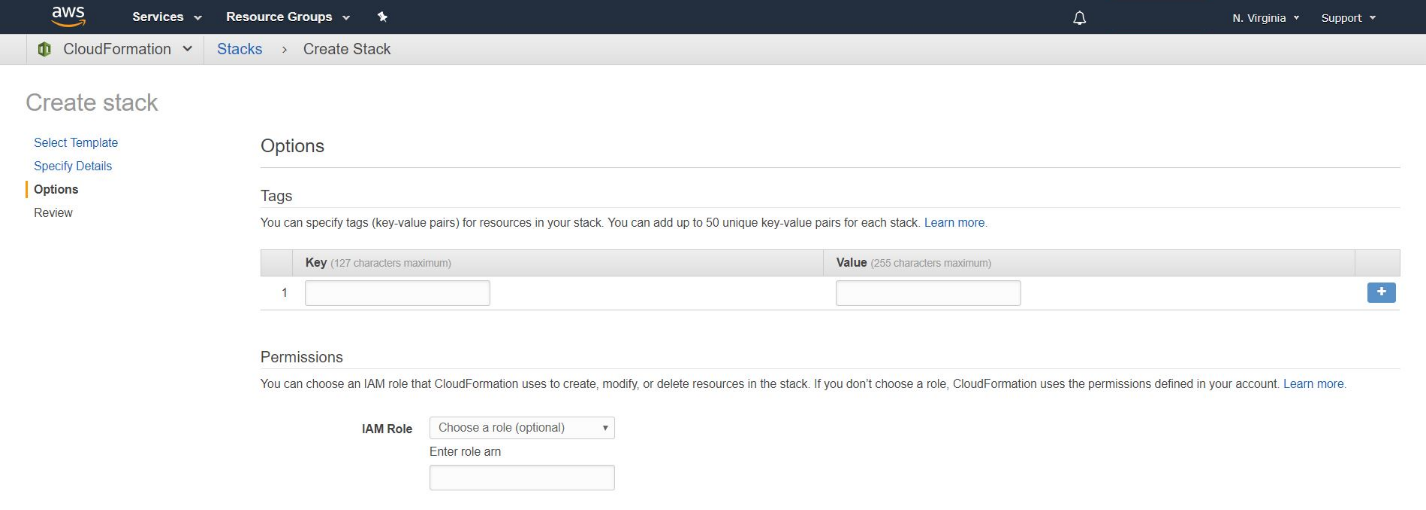
When you are satisfied with the options click on “next”.
This screen is just a review before you launch the template.
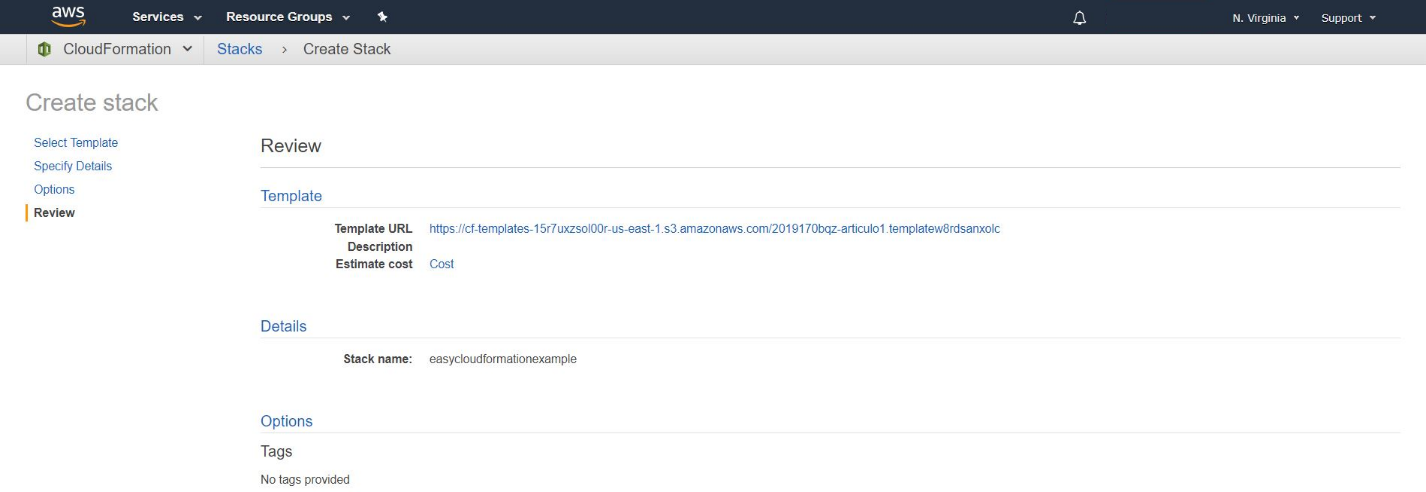
If everything is to your liking, finally click the “create” button.
You will be redirected to the main screen and you will be able to see the state of the stack that you are creating.
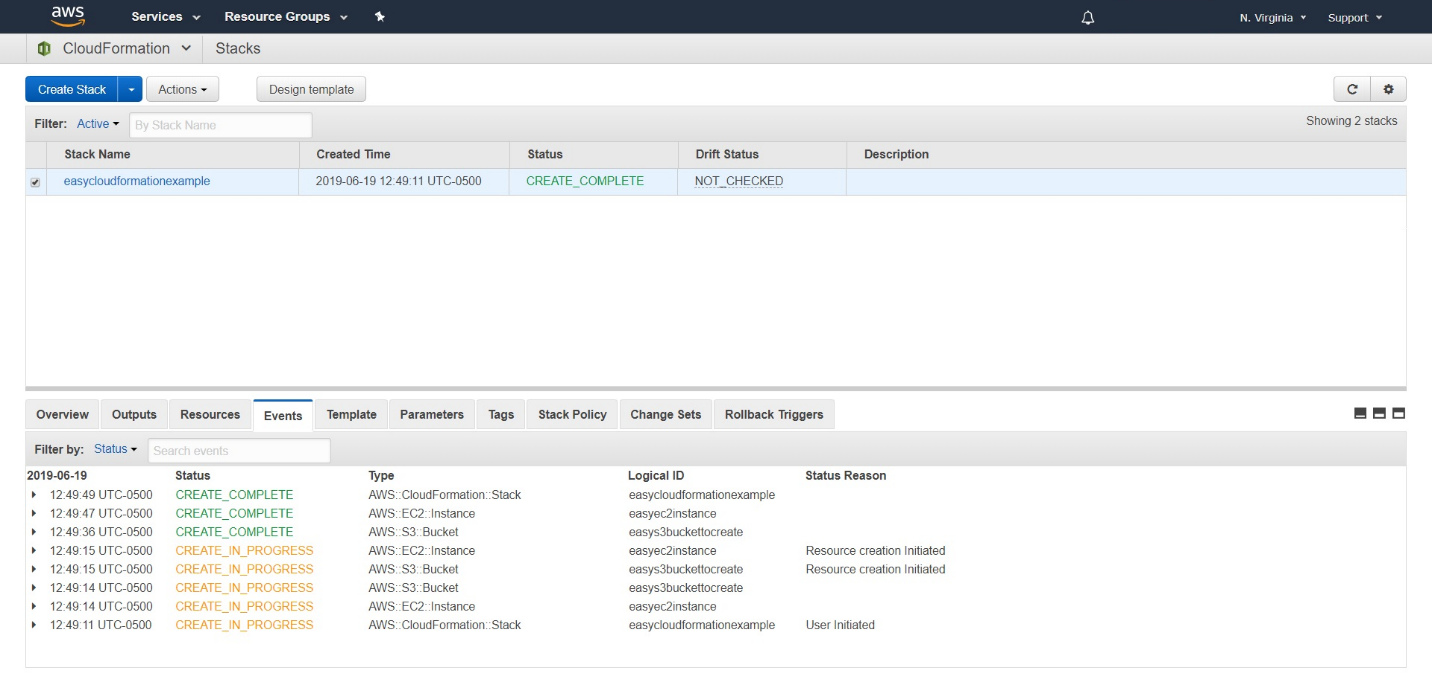
In the Status column, while the stack is being created, will show “CREATE_IN_PROGRESS”, after it has finished creating it, it will display “CREATE_COMPLETE”
Note: If for any reason, there is an error while creating the stack, it will show the status as “ROLLBACK_IN_PROGRESS”, this means that all resources created up to this point are being deleted.
After it is successfully created, you can check the resources up and running. To delete the resources, you just need to delete the stack on the console.
Terraform is a tool created by HashiCorp for building, changing and versioning infrastructure. It can manage different service providers as well as custom in-house solutions.
It is an open source tool that codifies APIs into declarative configuration files.
Terraform can work with other providers, not just AWS, for example: Azure, Bitbucket, Chef, and GitHub among many others.
Terraform uses its own configuration language, the main purpose of the Terraform language is declaring resources. A group of resources can be gathered into a module, which creates a larger unit of configuration.
A Terraform configuration consists of a root module, where evaluation begins, along with a tree of child modules created when one module calls another. The syntax of the language consists of:
The Terraform language uses configuration files with the .tf file extension. A module is a collection of .tf files kept together in a directory. The simplest Terraform configuration is a single root module containing a single .tf file.
So, we will be using Terraform to create the same resources as before, S3 bucket and an EC2 instance with a security group within a subnet that it is within a VPC.
To begin to use Terraform you will need to download it and install it on our PC.
https://www.terraform.io/downloads.html
Let’s see the same example as before but using Terraform. As mentioned before, we will need to create a .tf extension file with the resources that we want to be deployed.
The code that we will use is as follows:
resource "aws_vpc" "easyvpc" {
  cidr_block = "10.0.0.0/16"
}

resource "aws_subnet" easysubnet{
  vpc_id            = "${aws_vpc.easyvpc.id}"
  availability_zone = "us-east-1a"
  cidr_block        = "10.0.1.0/24"
}

resource "aws_instance" "easyec2instance" {
  availability_zone = "us-east-1a"
  ami               = "ami-0cc96feef8c6bbff3"
  instance_type     = "t2.micro"
  key_name          = "MyPrivateKey"
  vpc_security_group_ids = ["${aws_security_group.easyinstancesecuritygroup.id}"]
  subnet_id              = "${aws_subnet.easysubnet.id}"
}

resource "aws_security_group" "easyinstancesecuritygroup" {
  name        = "terraformsg"
  vpc_id      = "${aws_vpc.easyvpc.id}"

  ingress {
    from_port   = 443
    to_port     = 443
    protocol    = "tcp"
    cidr_blocks = ["0.0.0.0/0"]
  }
  ingress {
    from_port   = 80
    to_port     = 80
    protocol    = "tcp"
    cidr_blocks = ["0.0.0.0/0"]
  }
  ingress {
    from_port   = 22
    to_port     = 22
    protocol    = "tcp"
    cidr_blocks = ["0.0.0.0/0"]
  }

}

resource "aws_s3_bucket" "easybucketterraform" {
  bucket = "easybucketterraform"
  acl    = "private"
}
Note: if you haven’t configured AWS CLI, you will need to provide the access key and secret key inside the .tf file, if you have configured it, you won’t need to provide these keys.
Save this file inside the Terraform folder where you placed the application (.exe)
I’ll use the command prompt from Windows.
To see the available commands, just type terraform in the console. You will see the most common commands with a small description of what they do.
First, you will need to initialize your working directory, so type terraform init on the console, if everything is correct you should see the following output.
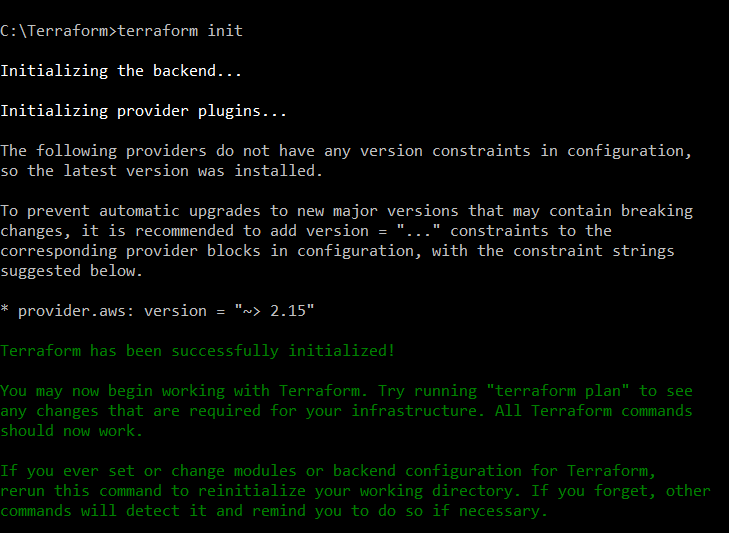
After you have initialized, you will need to build your infrastructure by using the command apply. Write terraform apply in the console so it will begin to create the resources of your .tf file.
You will be prompted to write down the region where you want your resources to be created, choose one.

After that, Terraform will display to you all the actions that it will perform and will ask you if you want to perform these actions.
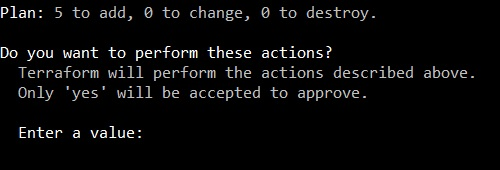
If all looks ok to you, type yes and Terraform will begin to create your resources.
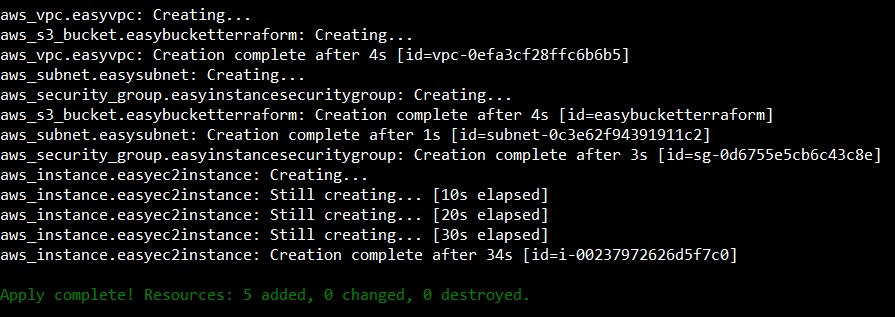
And it is done, you can check that your resources are up and ready to go.
If you want to delete the resources type terraform destroy on the console, the process is identical as before.
| CloudFormation | Terraform | |
|---|---|---|
| Code | Close Source | Open Source |
| Cloud | AWS only | All |
| Type | Orchestration | Orchestration |
| Infrastructure | Immutable | Immutable |
| Language | Declarative (JSON/YAML) | Declarative (HCL) |
| Architecture | Client-Only | Client-Only |
Both tools are great and easy to use. Given the differences and looking what both services provide, you can choose between them depending of what your needs are. If you are exclusively working on AWS environment, I would suggest that you use CloudFormation, since it is a service that is native to AWS and specifically designed to work with its resources. On the other hand, Terraform is a good way to provision your infrastructure in case you are not familiarized CloudFormation, or for some reason you can’t use it, or you need to achieve a multi-Cloud strategy. Nevertheless, if you need to use IaC for other providers, Terraform is a great tool to help you achieve your goal.