
The Lambda@Edge is an extension of AWS Lambda, which helps to execute functions that customize the content CloudFront delivers through the events, such as viewer request, origin request, origin response, and viewer response.
This article describes how to trigger an edge function on a CloudFront Distribution to deliver dynamic content based on the device using the origin request event.
Create a Lambda@Edge to serve dynamic content based on the device.
CloudFront Distribution created:
Static website hosted on Amazon S3:
1. Create an IAM Role for Lambda@Edge
Note: The role must have a Trust relationship configuration for Lambda@Edge.
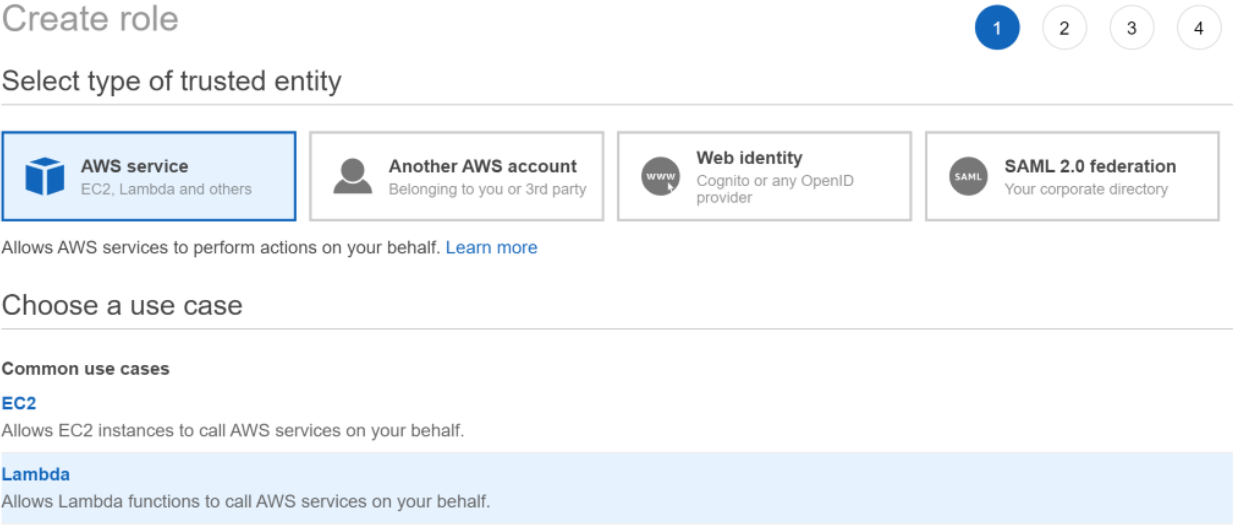
Enter the AWS console, go to the IAM service, and in the left panel, select the Roles option. Then, click over "Create Role," choose the "Lambda" option to use case, and tap on Next.
Filter by the lambda word and mark the checkbox for the AWSLambdaRole policy.

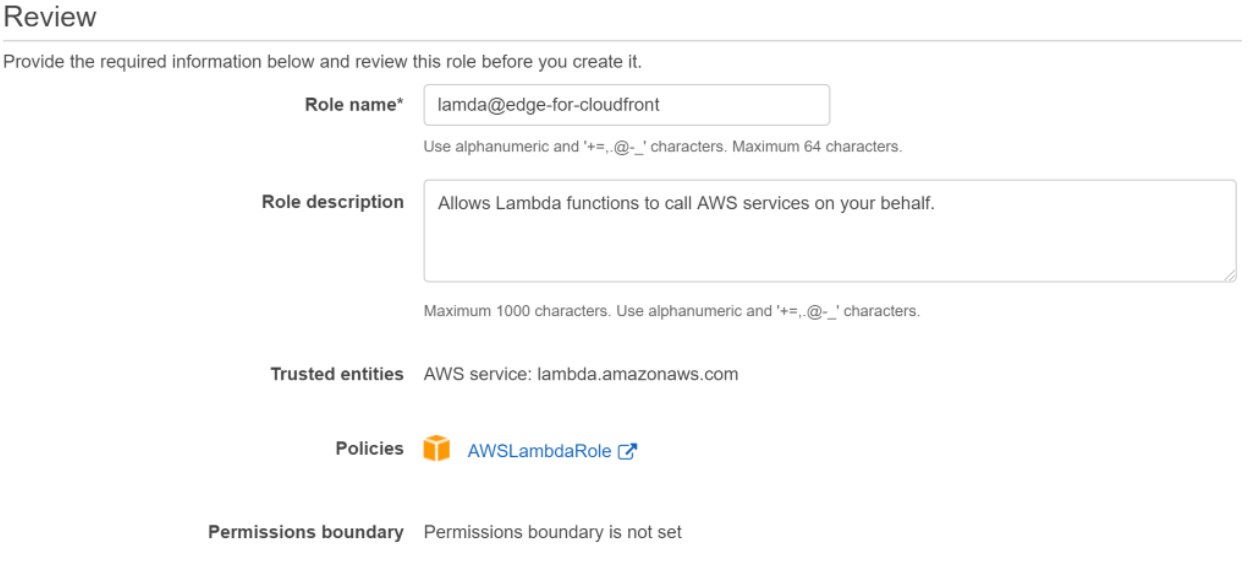
Then, tap on the "Next" button until the Review page. Enter a role name to identify it. Consider that we will need it later. Once the review was validated, create the role.
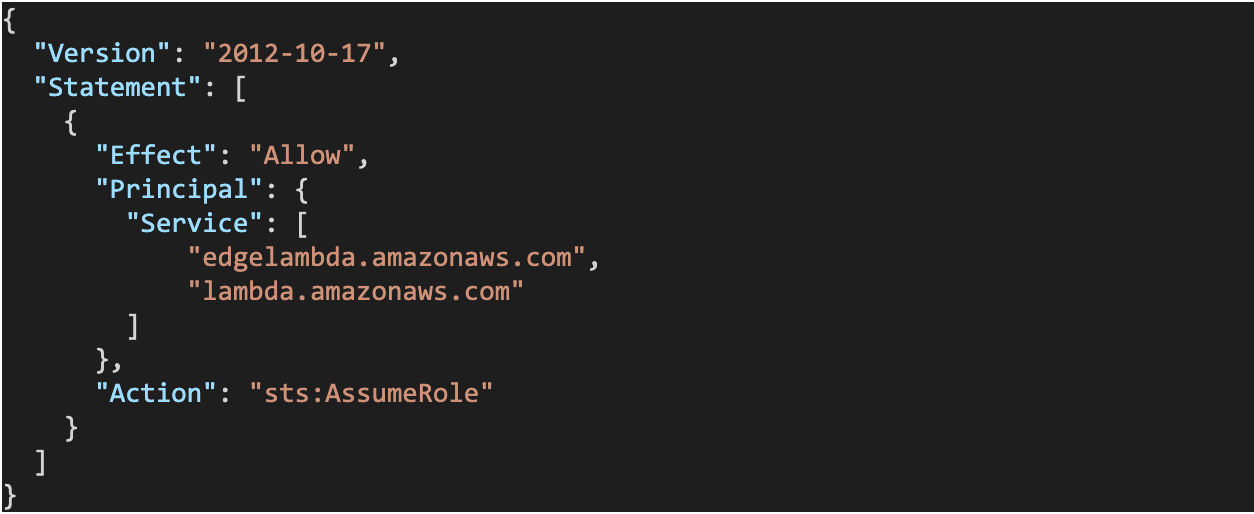
In the policy, the document adds the edgelambda.amazonaws.com line into Service and updates it. Configure the role as follows to avoid syntax errors.
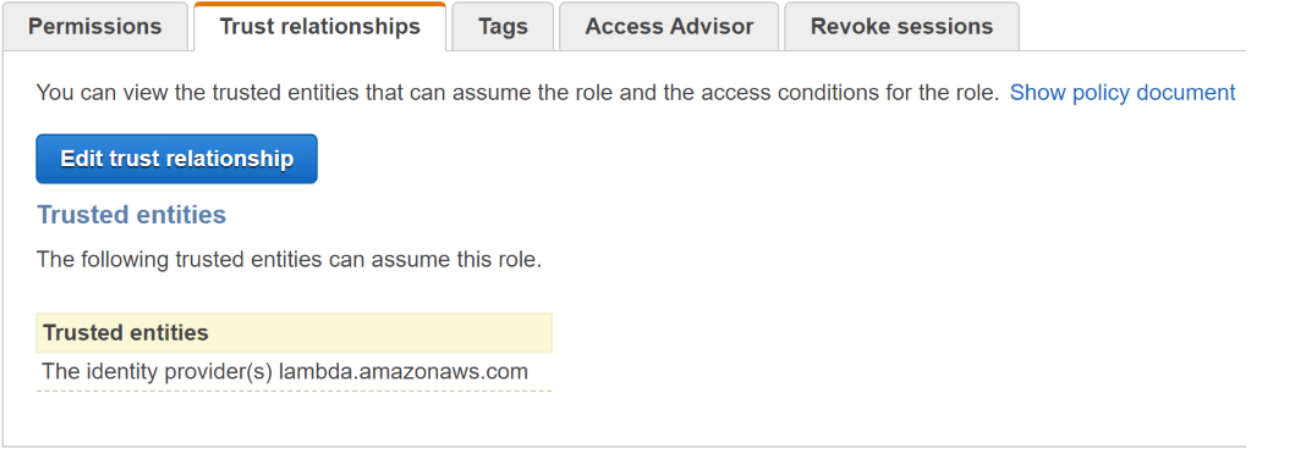
The trust entity must be successfully added.
2 Create a Lambda@Edge for CloudFront
a. Lambda Function
On the AWS console, go to Lambda service and tap on Create function. On the next screen, the "Author from scratch" must be selected, then enter a Lambda name and choose the "Node.js 12.x" version as runtime.
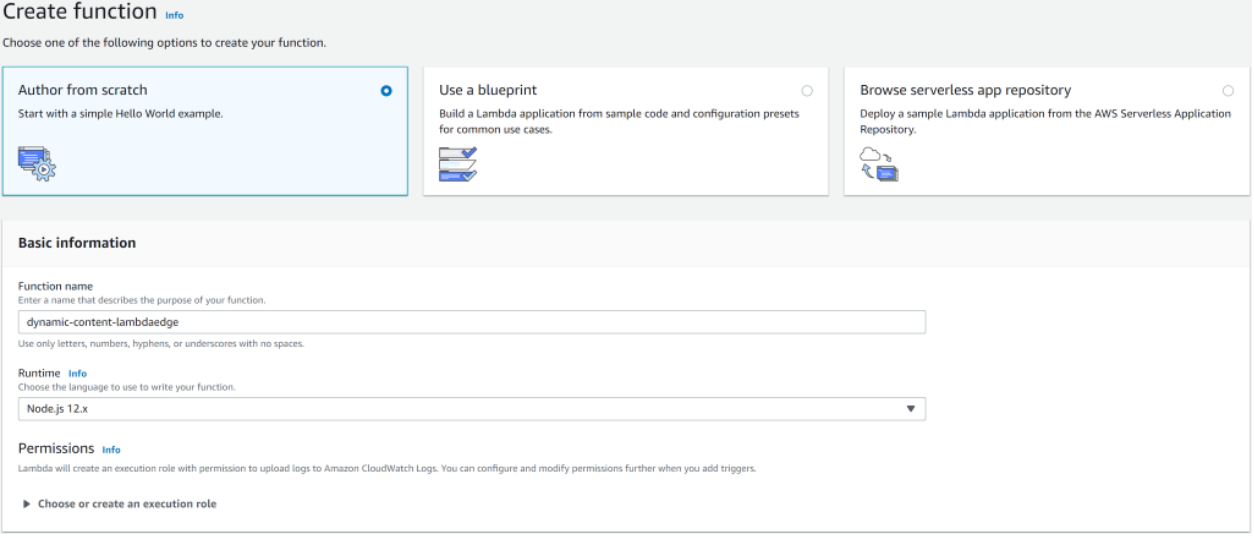
Next, in the dropdown box of the "Choose or create an execution role" options, select "Use an existing role," and choose the role created in the first step.

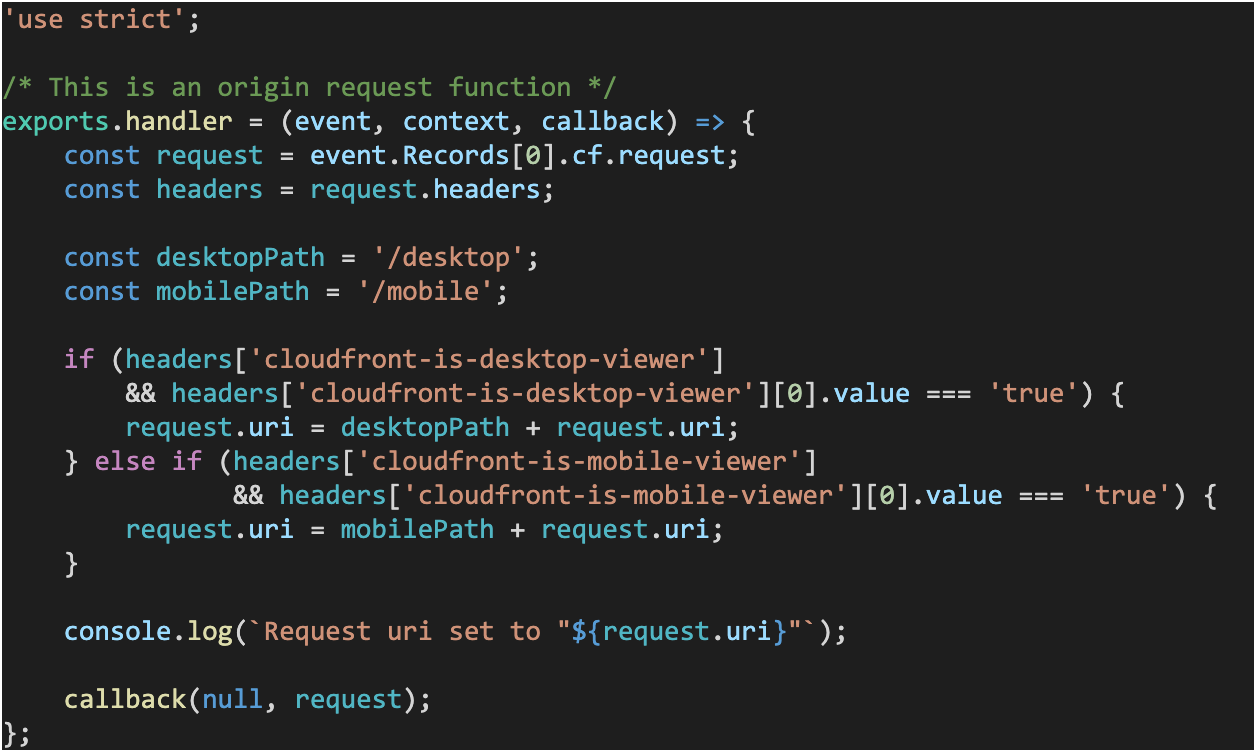
Once the Lambda is created, you can copy and paste the code below on the index.js file and save the changes.
b. Deploy to CloudFront
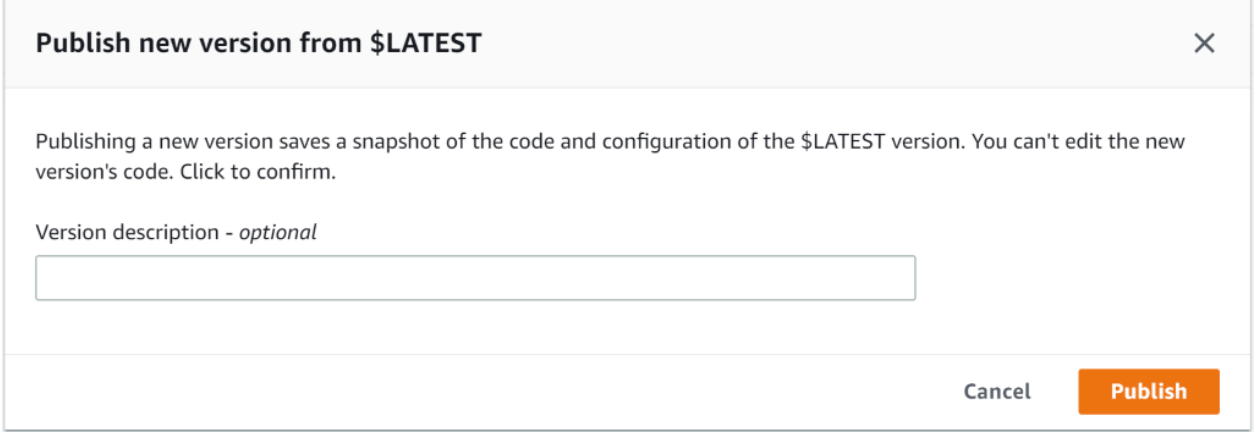
To deploy the Lambda@Edge on CloudFront, it is necessary to publish a new version of the Lambda. In the menu at the top of the page, choose "Actions" and "Publish new version," leave the description blank, and tap on "Publish."
After that, choose "Add trigger" and in the Designer section select CloudFront as a trigger, then complete the following options and tap on "Add":
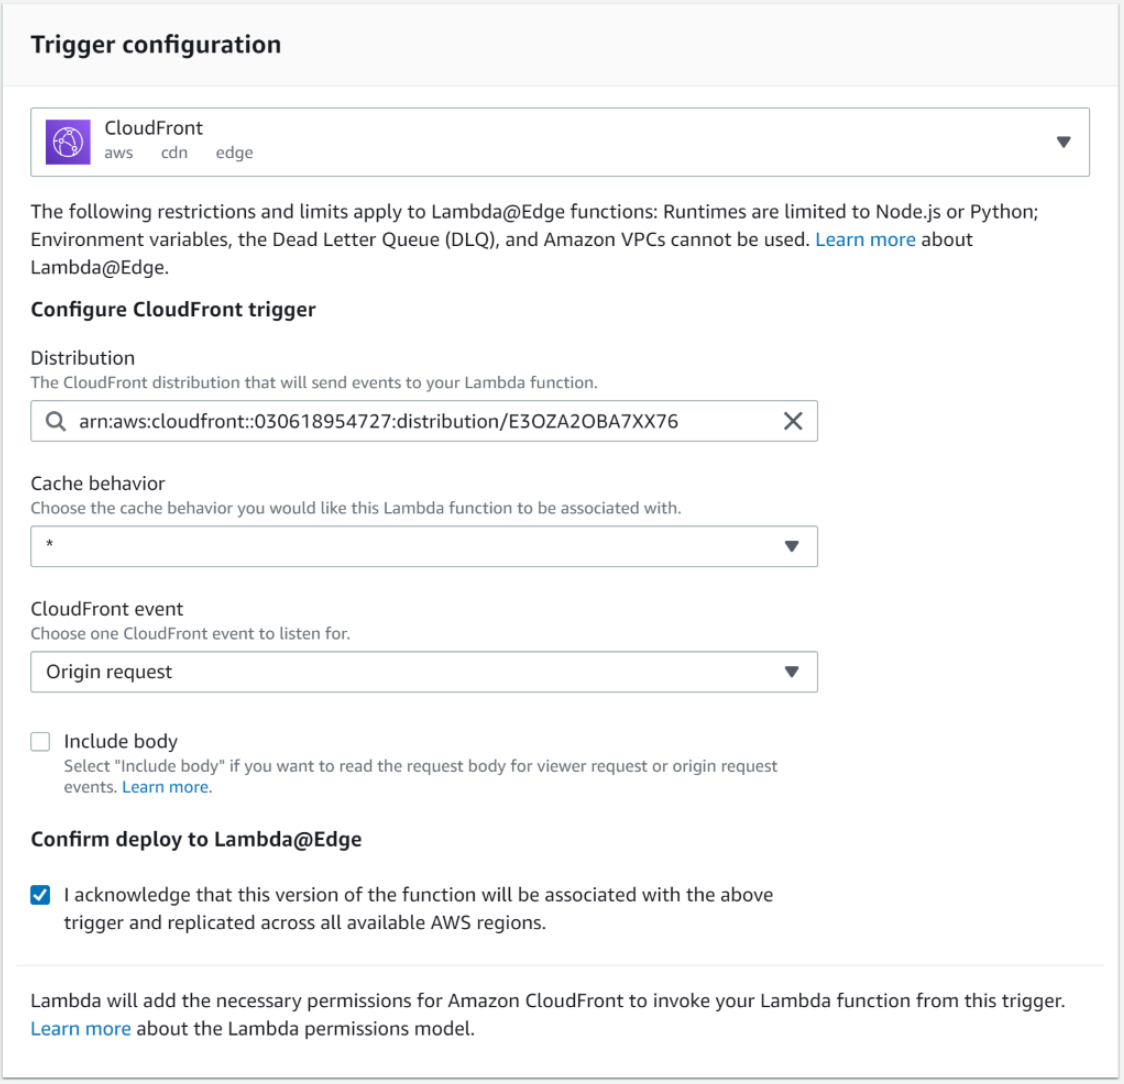
The trigger should be successfully added, as shown below:
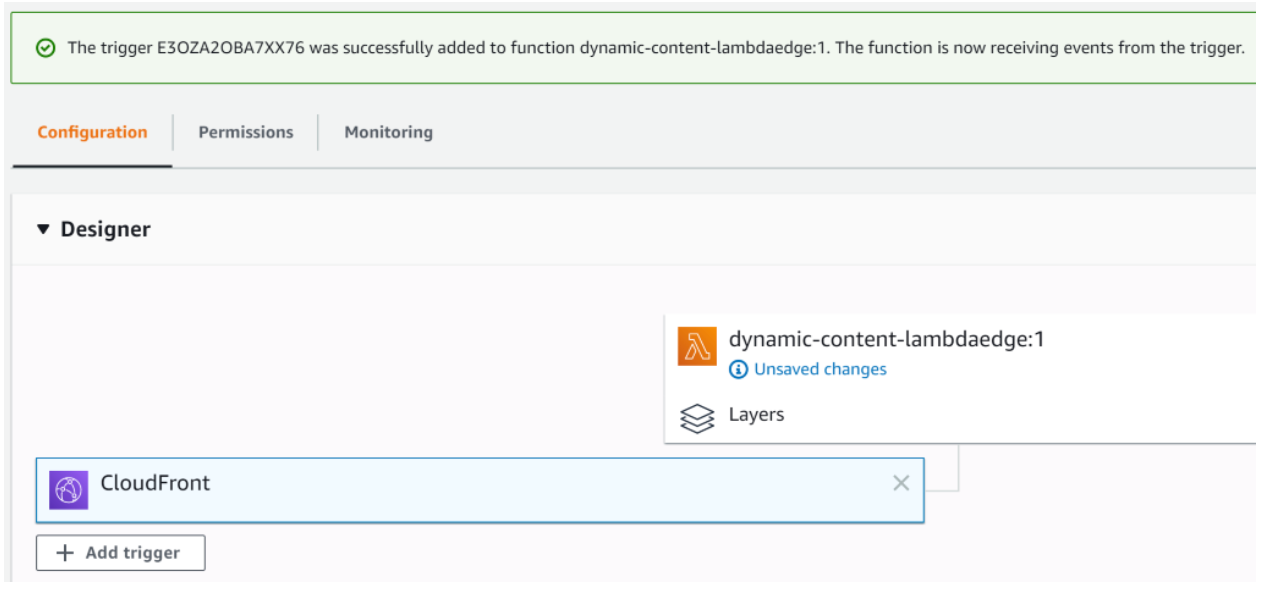
After deploying the lambda@edge, CloudFront Distribution should be displayed the status "in progress" and, after several minutes, must change to "Deployed."

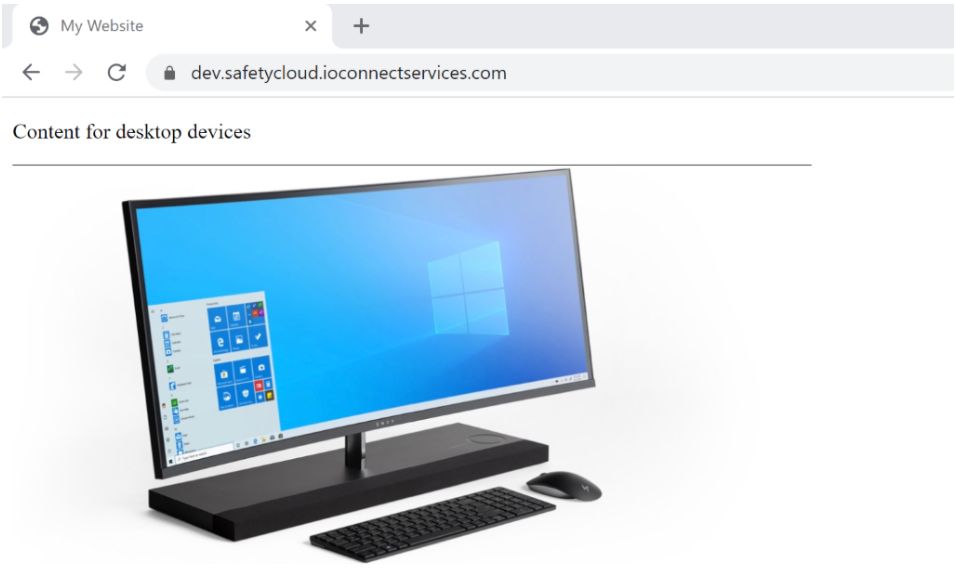
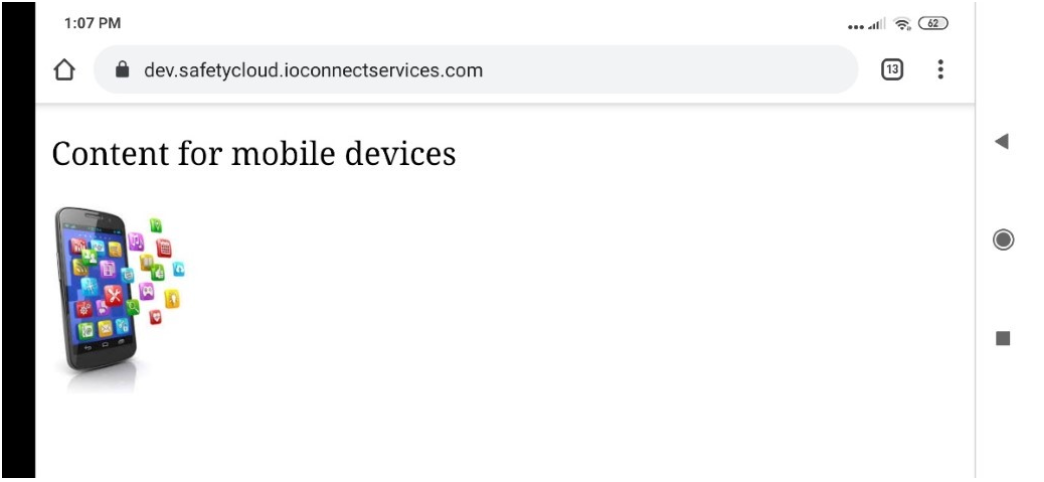
Once all services are deployed correctly, open any browser (Chrome, Firefox, Safari) on a desktop or laptop and a smartphone. Enter the URL of your website and compare the results.
Note: For testing the article, we used the "dev.safetycloud.ioconnectservices.com" domain created on Amazon Route 53 that points to our CloudFront, but if you do not have a custom domain name, use the CloudFront domain name.
1. Desktop test
2. Smartphone test
Lambda@Edge is an excellent solution for CloudFront distributions if you want to improve performance, generate dynamic content based on attributes of requests or responses, add security layers, or handle different origins, to mention some uses. In this article, we show how to associate with a trigger a CloudFront Distribution to serve dynamic content based on the device and use the origin request event for the cache behavior.