
This article describes how to implement three different Blue/Green deployment strategies using Auto Scaling Groups with zero downtime.
Blue-green deployment is a technique that reduces downtime and risk by running two identical production environments called Blue and Green.
At any time, only one of the environments is life, with the live environment serving all production traffic.
This technique can eliminate downtime due to app deployment. In addition, blue-green deployment reduces risk, if something unexpected happens with your new version on Green, you can immediately roll back to the last version by switching back to Blue.
Perform three different ways to do a Green/Blue deployment when you are using Auto Scaling Groups in AWS.
We will talk about three different deployment strategies using Auto Scaling Groups (ASG) in Amazon Web Services with no downtime.
We will be using ASG (with Launch Configuration), Elastic Load Balancers (with Target Groups), and finally Route 53.
I will explain how to create these services from the AWS Console down below and after that, I will explain how each strategy works.
1. How to create an ASG
To create an ASG, we need to access the EC2 service on the console
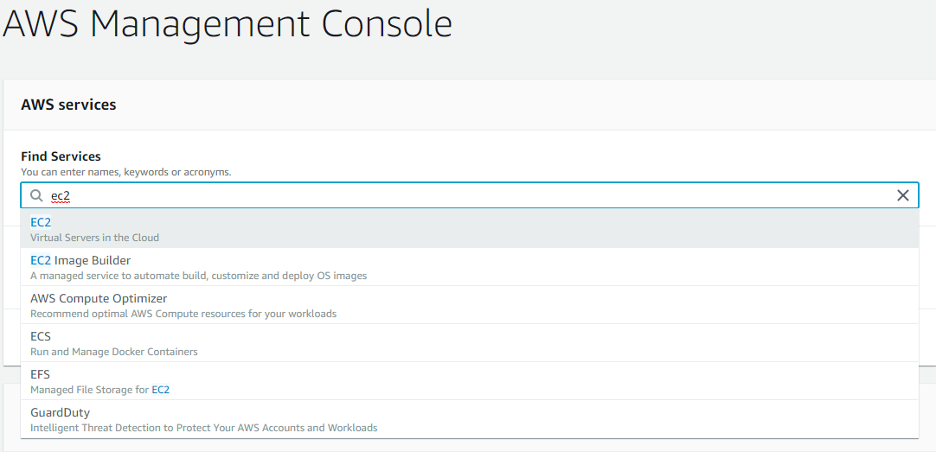
Inside the service, we locate Auto Scaling from the menu on the left of the screen

The first step is to click on Launch Configurations and click “Create launch configuration”

In here you choose the AMI of the EC2 that best fits your needs that the Auto Scaling will use

Next, you select the instance type

On the next screen, you configure details
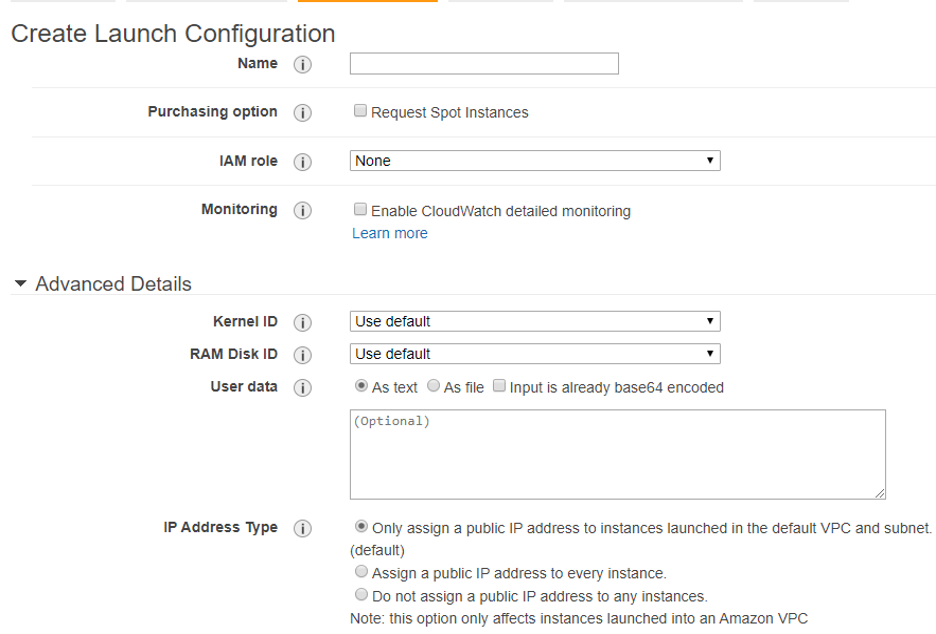
On the next screen, you add the storage that each EC2 will have

Then you configure the security group, you can create a new one or select an existing one.

Finally, you review all the details, if everything is good, create the launch configuration.
Note: it will ask you to create or choose an existing key pair, choose as needed (This Key Pair is to SSH into the instances).
Once the launch configuration is created, we need to create an ASG that will use this launch configuration, click on the “Create an Auto Scaling Group using this launch configuration” button.
In this screen, you configure the Auto Scaling details
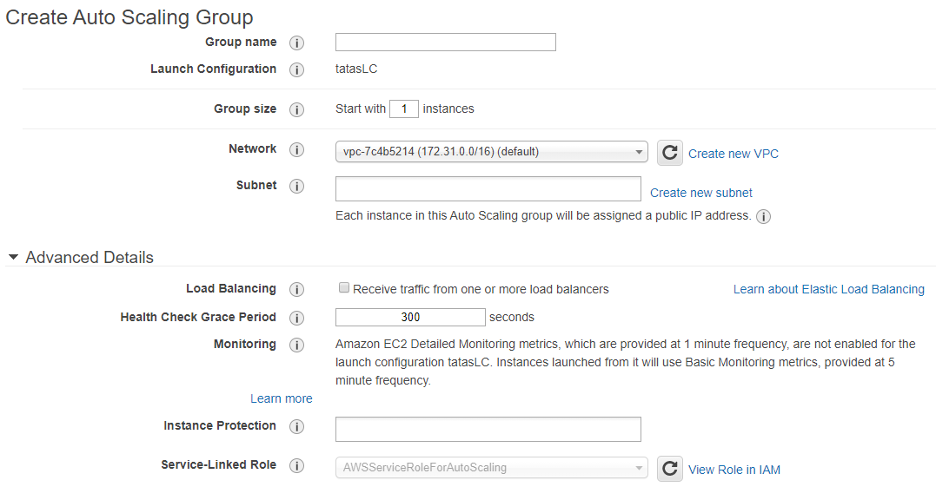
Then you can set scaling policies for this group

On the next screen, you can add a notification (using SNS) when an event takes place.
After that, you can configure tags for this ASG.
Finally, review all the information, and when it is ready to go, create the ASG.
2. How to create an Elastic Load Balancer
Now we will create a Load Balancer.
On the left menu of EC2 service, click on Load Balancers

Click “Create Load Balancer”
In this case, choose Application Load Balancer.
Then you can configure your Load Balancer
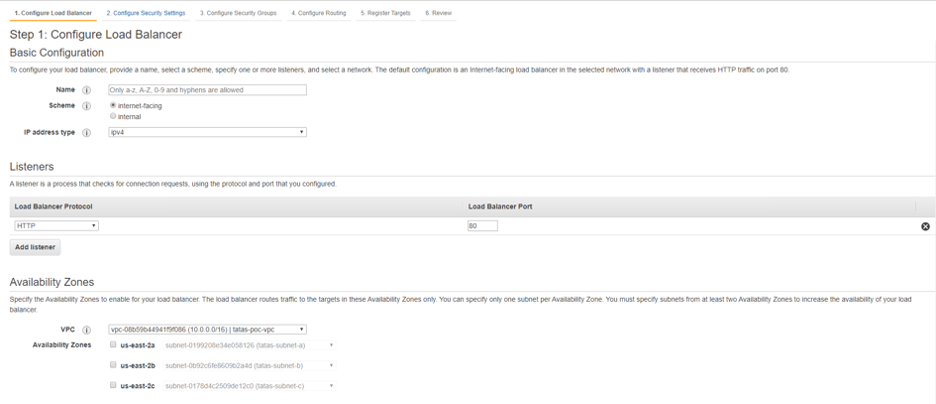
On the next screen, you can configure security settings.
On the following screen configure your security groups.
Then you configure the routing, here you create a Target Group.

Next, you register targets, this means adding your instances to the Load Balancer

Finally, you review all the settings and create your Load Balancer.
3. How to configure Route 53
When you have both of your environments (blue/green) you will want to send controlled traffic to each environment, to do that we are going to use Route 53.
On the Route 53 main screen, select Hosted Zones, if you do not have any, create one.
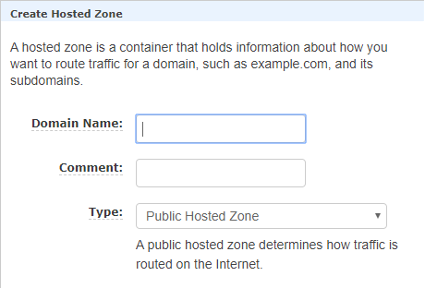
Once you have a Hosted Zone, click on the Domain Name and it will take you to another screen.
In this screen, you will have to create a couple of Record Sets so you can balance the traffic between your blue/green Load Balancers.
When you click the “Create Record Set” button you will have to input some information.
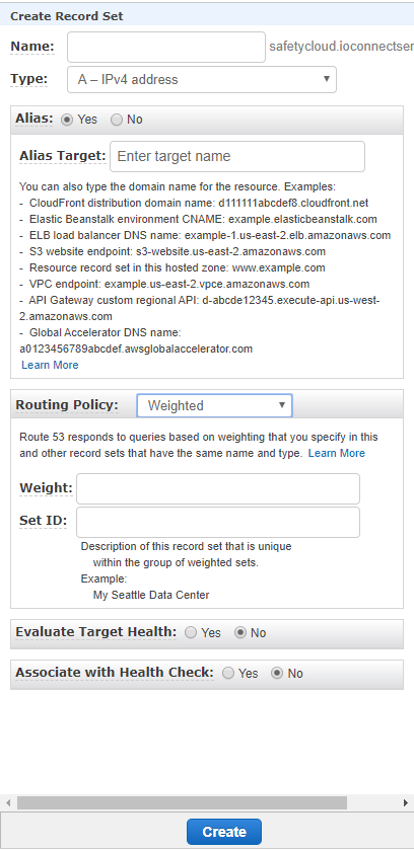
Name: Choose a name for your record set (it will be your domain name to access your application)
Type: A – Ipv4 address
Alias: Yes
Alias Target: Choose your Load Balancer (Blue or Green) endpoint
Routing Policy: Weighted
Weight: The value that you want to specify to route to that endpoint (from 0 to 255)
Set ID: Unique description that differentiates from other weighted record sets that have the same name and type (Maximum of 128 characters).
And finally, click create.
Now you have all the tools to create what you need.
Now I will explain how these strategies work.
1. Using AWS Route 53 with weighted policy
For this deployment, we will be using Route 53, Elastic Load Balancer, and ASG.
The main idea of this deployment is to have two identical environments and make use of Route 53’s weighted policy to successfully achieve the new deployment with zero downtime.
Below is the diagram of this solution.
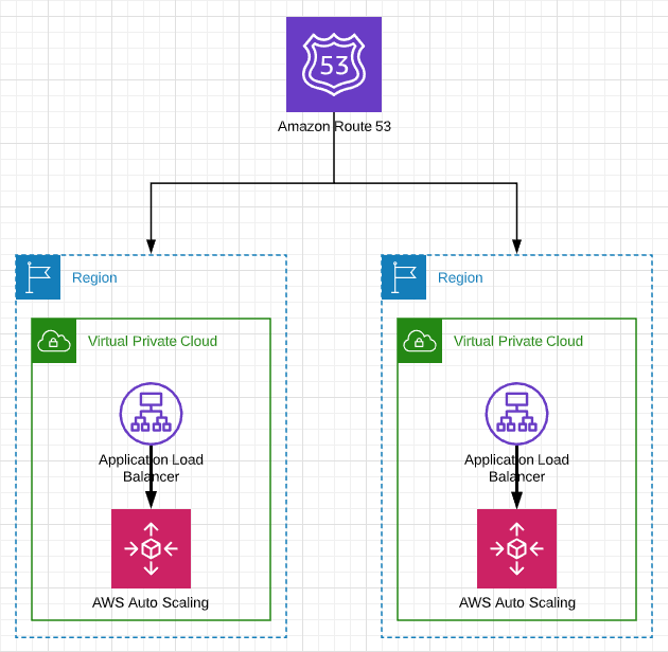
Note: you can apply this to two Load Balancers in the same region as well
Having created the architecture based on the diagram, on Route 53 you create a couple of record sets with weighted policy, usually at first the percentage is greater on the blue environment than the green. So, you ultimately direct all the traffic to the green environment.
In case a rollback is needed, you only route all the traffic back to the blue environment.
2. Using a single Load Balancer with two ASG without Route 53
For this deployment, we will be using an Application Load Balancer and two ASG (Blue and Green).
Following the above steps, we create these resources.
Below is the deployment solution diagram
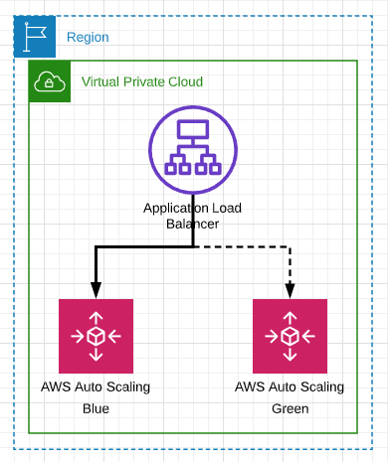
Here we have our Load Balancer pointing to our Blue Auto Scaling, so, to make the deployment to our Green ASG we just attach it to the Load Balancer.
We do this by editing our Green ASG like below
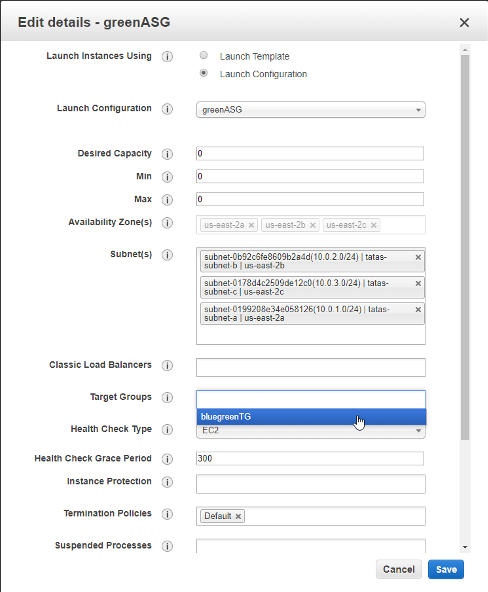
Also, you want to increase the desired capacity of the ASG.
Now our Load Balancer will be routing traffic to both our ASG, when your Green ASG is working properly (your application) you can remove the instances from the Blue ASG.
In case of rollback, you just bring back up the instances from the Blue ASG.
3. Using a single Load Balancer with one ASG and to Launch Configuration
In this deployment we are going to use a single Load Balancer, one ASG, and two Launch Configuration (one being Blue and the other Green).
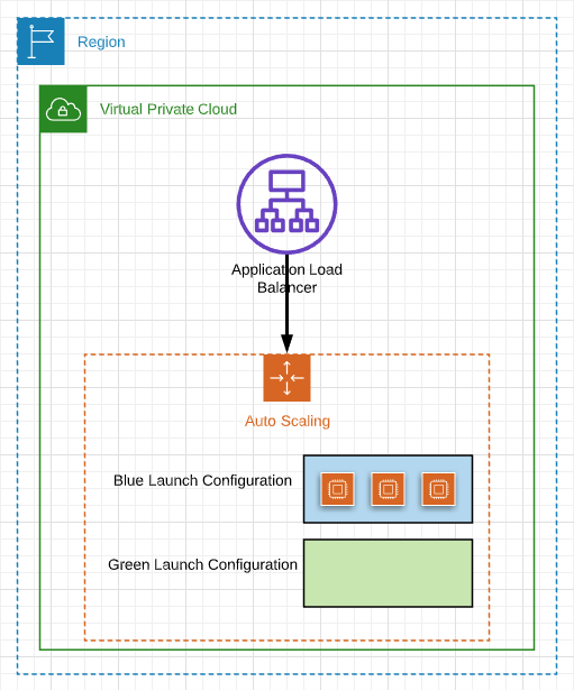
Here we have our Blue Launch Configuration attached to our ASG, we edit our ASG and attach the Green Launch Configuration and we double the number of instances that were running so the ASG launches the same number of instances we had with the new Launch Configuration. I.E. if our ASG attached to Blue Launch Configuration had 3 instances running, when we modify it and attach the Green Launch Configuration, we must have 6 instances running.
The ASG has instances deployed from both Launch Configurations, when the new instances are running fine, you just return the number of instances to the initial size (in the previous example we would return to 3 instances).
The ASG will delete the instances based on the Termination Policy specified, we have to choose Old Launch Configuration, so the ones that are deleted are from the previous Launch Configuration.
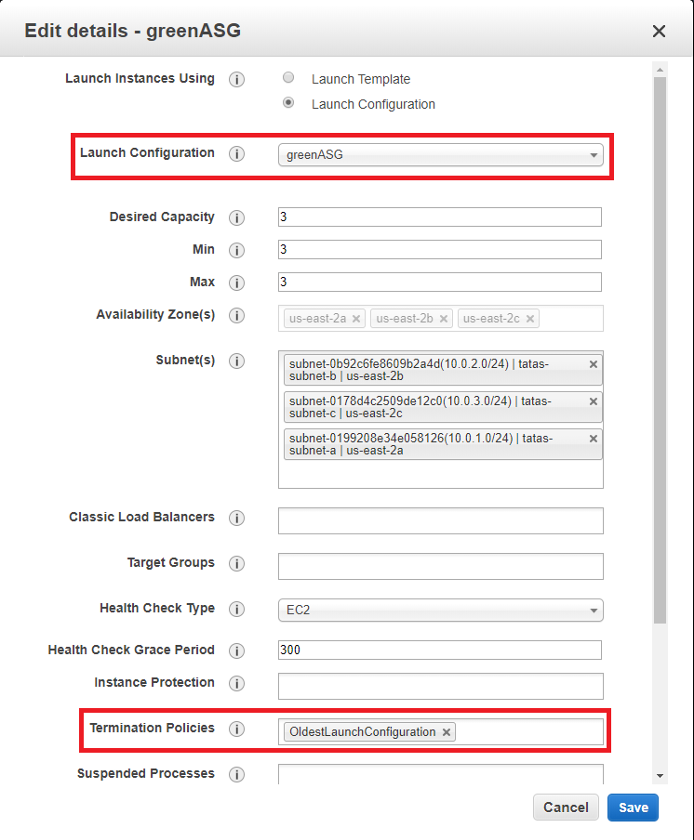
In the event rollback is needed, you attach again the Blue Launch Configuration, double the size of the instances, and when they are running reduce the size to the original configuration.
Here we have three different ways to do blue/green deployments using ASGs.
The most relevant aspect of these deployment strategies is that there is no downtime when you apply them which is an important matter when you deal with new deployments.
I hope with this, you have a broader vision of the capabilities that Auto Scaling can offer us for deployments.